
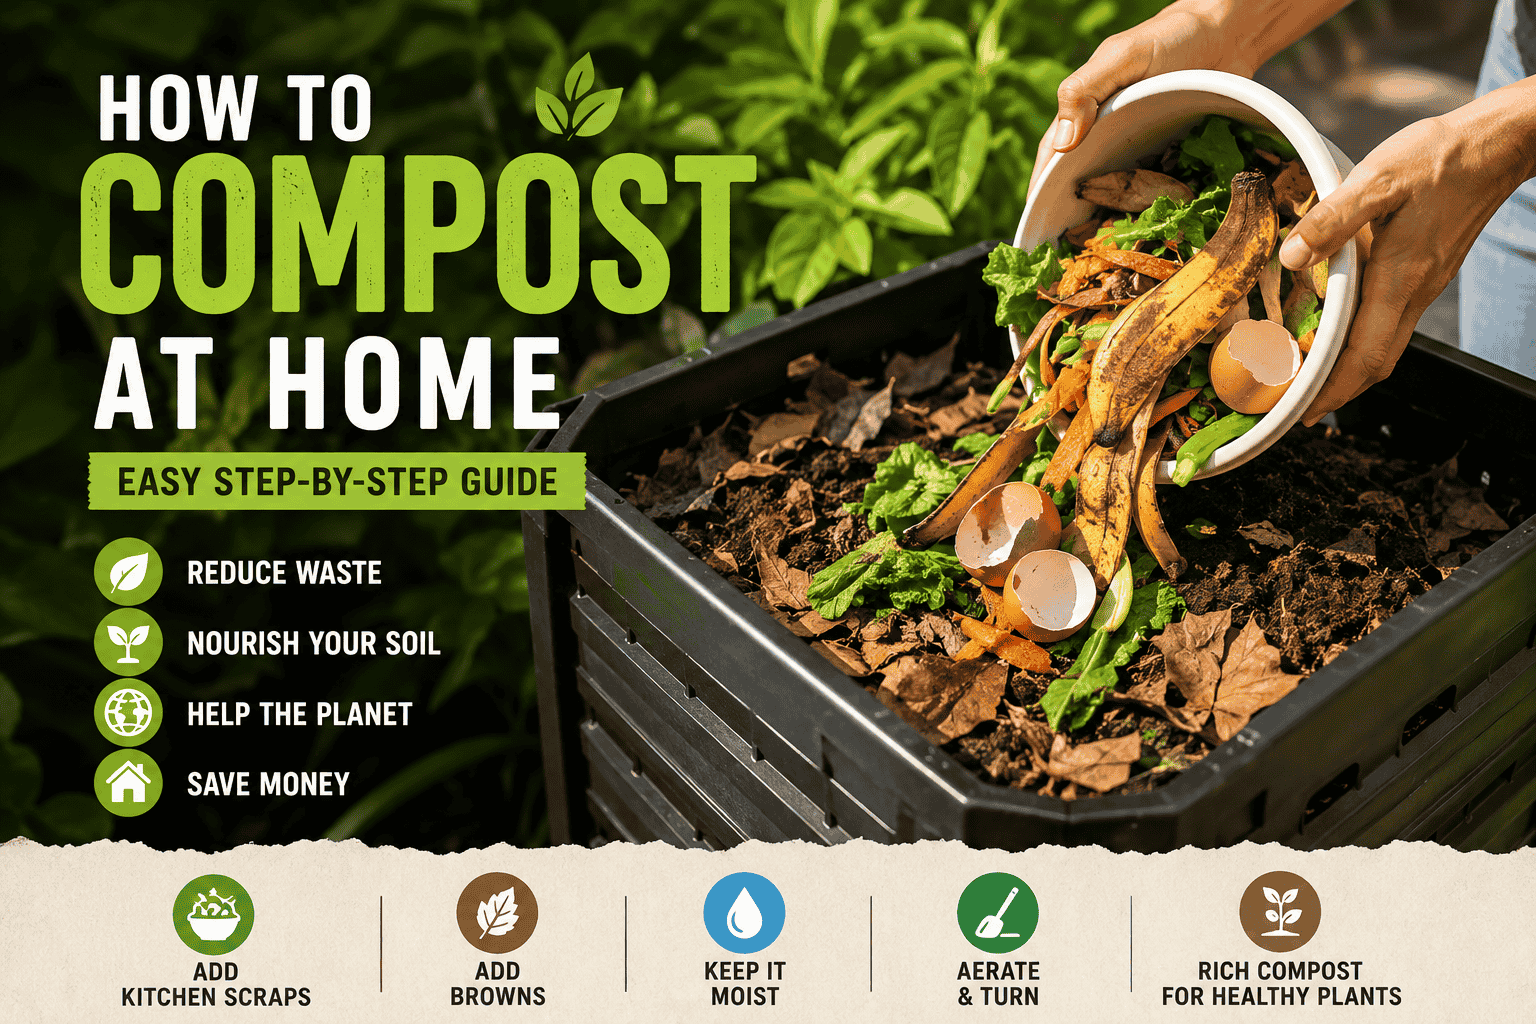
How to Compost at Home: Easy Beginner Guide
introduction
Want to learn how to compost at home without buying expensive equipment or turning your yard into a smelly mess? The good news is that home composting is much easier than it first appears.
With a simple bin or compost pile, kitchen scraps, dry leaves, cardboard, water, and a little patience, you can turn everyday organic waste into dark, crumbly compost that improves your soil and supports healthier plants.
This beginner-friendly guide explains how to start composting at home step by step, what you can compost, what you should never add, how to balance greens and browns, how often to turn your pile, how to fix bad smells, and how to know when your compost is ready.
Quick answer: To compost at home, choose a suitable bin or pile, add a mixture of nitrogen-rich “greens” and carbon-rich “browns,” keep the pile moist but not soggy, provide enough air, and give the microorganisms time to break everything down.
What Is Composting?
Composting is the natural process of breaking down organic materials such as fruit and vegetable scraps, leaves, grass, and other suitable plant material into a dark, soil-like material called compost.
Microorganisms, fungi, insects, and other decomposers do most of the work. Your job is simply to create the right conditions for them.
A successful compost pile needs four basic ingredients:
- Greens: Nitrogen-rich materials such as fruit and vegetable scraps and fresh grass.
- Browns: Carbon-rich materials such as dry leaves, cardboard, and small twigs.
- Water: Enough moisture to keep the microorganisms active.
- Air: Oxygen that supports aerobic decomposition.
When these ingredients are reasonably balanced, organic waste gradually becomes finished compost.
Why Should You Compost at Home?
Learning how to compost at home can benefit both your garden and your household.
1. Turn Kitchen Waste Into Something Useful
Fruit peels, vegetable trimmings, coffee grounds, and other suitable organic scraps don’t have to go straight into the trash. Composting gives many of these materials another purpose.
2. Improve Your Soil
Finished compost can be mixed into garden soil to improve its structure and help create a better growing environment for plants.
3. Support Healthier Plants
Compost adds organic matter to soil and helps create conditions that support beneficial soil organisms.
4. Reduce Household Organic Waste
Instead of treating every food scrap as garbage, you can separate suitable organic materials and return them to the soil cycle.
5. Save Money on Soil Amendments
If you maintain a compost system successfully, you can produce a useful soil amendment from materials you already have at home.
How to Compost at Home Step by Step
Now let’s get into the practical part. You don’t need to make composting complicated. Follow these steps and adjust your pile as you learn how it behaves.
Step 1: Choose Your Composting Method
First, decide which type of composting fits your home.
- Outdoor compost bin: Best if you have a yard, garden, or suitable outdoor space.
- Compost pile: A simple option when you have enough space and don’t need an enclosed container.
- Compost tumbler: Useful when you want an enclosed system that is easy to turn.
- Worm composting: A good option for people with limited space who want to compost kitchen scraps.
- Bokashi-style fermentation: An alternative system that can work in situations where traditional outdoor composting isn’t practical.
For most beginners with outdoor space, a basic compost bin is a straightforward place to start.
Step 2: Pick the Right Location
Choose a location that is easy to access because you will need to add materials and occasionally maintain the pile.
Look for a spot with good drainage and enough room to work around the bin. Keeping the composting area reasonably close to your kitchen or garden can also make the habit easier to maintain.
Avoid putting the pile directly against a fence or in a location where water regularly collects.
Step 3: Collect Your Brown Materials
Brown materials provide carbon and help create structure and airflow inside the pile.
Good brown materials include:
- Dry leaves
- Small twigs
- Untreated wood chips
- Shredded plain cardboard
- Uncoated paper
- Paper bags
- Dry plant material
- Straw
- Dry grass clippings
One of the best beginner tips is to keep a supply of dry leaves or shredded cardboard beside your compost bin. Whenever you add wet kitchen scraps, you can immediately cover them with brown material.
Step 4: Collect Your Green Materials
Green materials provide nitrogen and moisture.
Common compostable greens include:
- Fruit scraps
- Vegetable scraps
- Vegetable peels
- Fresh grass clippings
- Fresh plant trimmings
- Coffee grounds
- Paper coffee filters
- Suitable tea leaves or tea bags without plastic components
- Crushed eggshells
Don’t worry about creating a scientifically perfect mixture for every handful. The goal is to maintain a healthy overall balance rather than obsess over every individual ingredient.
Step 5: Build the Bottom Layer
Start with a layer of coarse brown material such as small twigs or dry plant material.
This creates space for air movement and helps prevent the bottom of the pile from becoming a compact, wet mass.
Step 6: Add Greens and Browns
Begin adding alternating layers or mixing green and brown materials together.
A useful beginner rule is to use roughly 2 to 3 parts brown material for every 1 part green material by volume. Different composting guides use slightly different ratios, so treat this as a practical starting point rather than a rigid scientific law. The EPA specifically recommends at least two to three times as much brown material as greens for a backyard pile.
If you add a bucket of food scraps, follow it with several buckets of dry leaves, shredded cardboard, or another suitable brown material.
Step 7: Cut Large Materials Into Smaller Pieces
Large pieces take longer to break down. Chop tough vegetable scraps, stems, and other large organic materials into smaller pieces before adding them.
Smaller pieces expose more surface area to decomposing organisms and can help the pile process material more efficiently.
Step 8: Keep the Compost Moist
Your compost should be damp but not waterlogged.
A simple way to judge moisture is to think about a wrung-out sponge. The pile should contain moisture, but it shouldn’t be dripping wet.
If your compost is extremely dry, add a little water and mix the pile.
If it is soaking wet, add dry browns such as shredded cardboard or dry leaves and improve airflow.
Step 9: Give the Pile Enough Air
Composting works best when oxygen can move through the material.
Turn the pile occasionally with a garden fork or compost aerator. Turning mixes the materials, introduces oxygen, and can help correct areas that are too wet or compacted.
You don’t necessarily need to turn your compost every day. The exact schedule depends on the type of system you’re using and how quickly you want decomposition to occur.
Step 10: Cover Fresh Food Scraps
Whenever you add food scraps, cover them with a layer of brown material.
This simple habit can help reduce odors and discourage flies and other unwanted visitors.
The EPA recommends covering food scraps with approximately 4 to 8 inches of dry leaves or another suitable brown material.
What Can You Compost at Home?
Knowing what belongs in your compost bin is just as important as knowing how to build the pile.
Kitchen Scraps You Can Usually Compost
- Apple cores
- Banana peels
- Fruit scraps
- Vegetable scraps
- Potato peels
- Carrot tops
- Broccoli stems
- Coffee grounds
- Paper coffee filters
- Crushed eggshells
- Suitable tea leaves
Garden Materials You Can Compost
- Dry leaves
- Fresh grass clippings
- Plant trimmings
- Small twigs
- Dead non-diseased plants
- Untreated plant material
- Straw
- Small amounts of untreated wood chips
Paper and Cardboard
Plain, non-glossy paper and untreated cardboard can be useful brown materials.
- Plain cardboard
- Brown paper bags
- Shredded uncoated paper
- Plain newspaper
Remove plastic tape, labels, stickers, and other materials that shouldn’t go into your compost.
What Should You NOT Put in a Home Compost Bin?
Not everything organic belongs in a typical backyard compost pile.
For a beginner home compost system, avoid:
- Meat
- Fish
- Bones
- Dairy products
- Large amounts of oily or greasy food
- Pet waste
- Cat litter
- Diseased plants
- Plants treated with herbicides or pesticides when the product guidance makes them unsuitable
- Plastic
- Glossy paper
- Painted or chemically treated wood
- Produce stickers
These materials can attract pests, introduce unwanted contaminants, or fail to break down properly in a typical backyard system. The EPA specifically advises avoiding meat, fish, bones, dairy, fats, oils, grease, pet waste, treated wood, glossy paper, and several other problematic materials in ordinary backyard composting.
What Are Browns and Greens in Composting?
If you’re completely new to composting, “browns” and “greens” can sound confusing. They’re actually simple categories.
| Greens | Browns |
|---|---|
| Fruit scraps | Dry leaves |
| Vegetable scraps | Shredded cardboard |
| Fresh grass | Dry grass |
| Coffee grounds | Small twigs |
| Fresh plant trimmings | Straw |
| Some manure | Plain paper |
Greens are generally wetter and nitrogen-rich. Browns are generally drier and carbon-rich.
Your compost needs both. Too many greens can leave you with a wet, smelly pile, while too many dry browns can slow decomposition.
How Much Brown and Green Material Do You Need?
There isn’t one magic ratio that every compost pile must follow because different materials contain different amounts of carbon, nitrogen, and moisture.
For a simple backyard system, start with approximately 2 to 3 parts browns to 1 part greens by volume. Then observe your pile and adjust.
If the compost smells bad or looks wet and compacted, add more browns.
If it remains very dry and decomposition is barely happening, add some greens and moisture.
The goal is not mathematical perfection. The goal is a pile with enough carbon, nitrogen, oxygen, and moisture for active decomposition.
How Long Does It Take to Make Compost at Home?
There is no single answer because composting time depends on the materials, pile size, temperature, moisture, oxygen, and how often the pile is maintained.
A well-managed backyard pile can produce usable finished compost in roughly 3 to 5 months, while a neglected pile may take considerably longer. The EPA notes that a well-maintained pile can be ready in about three to five months, while an untended pile may take around a year.
Don’t worry if your first batch takes longer. Beginner composting is about learning how your particular pile behaves.
How Do You Know When Compost Is Ready?
Finished compost doesn’t look like a pile of recognizable food scraps anymore.
Look for these signs:
- It is dark brown to nearly black.
- It has a loose, crumbly texture.
- It smells earthy rather than rotten.
- Most original materials are no longer recognizable.
- The pile has cooled down after active decomposition.
- Its volume has significantly reduced.
If you can still clearly see lots of fresh food scraps, thick stems, or other undecomposed material, give it more time.
How to Use Finished Compost
Once your compost is mature, you can use it as a soil amendment in many garden situations.
Mix It Into Garden Soil
Blend finished compost into garden soil to add organic matter and improve soil structure.
Use It Around Plants
A layer of mature compost can be used around garden plants as part of a soil-building routine.
Add It to Garden Beds
Finished compost is especially useful when preparing garden beds before planting.
Use It in Containers Carefully
Compost can be useful in container gardening, but pure compost isn’t always the best growing medium. It is generally better to combine compost with an appropriate potting or growing medium rather than filling containers entirely with compost.
How to Compost at Home Without a Backyard
You don’t necessarily need a large garden to start composting.
If you live in an apartment, have a balcony, or have very limited outdoor space, consider a compact system such as a worm bin, suitable indoor composting system, or another method designed for small spaces.
The important thing is to choose a method that matches your available space, the amount of organic waste your household produces, and the amount of maintenance you’re willing to do.
How to Compost Kitchen Scraps at Home
One of the easiest ways to begin is by collecting your kitchen scraps separately.
- Keep a small container near your kitchen work area.
- Add suitable fruit and vegetable scraps.
- Empty the container regularly into your compost system.
- Cover the fresh scraps with brown material.
- Mix or turn the pile when necessary.
- Monitor moisture and odor.
Keeping your kitchen collection container covered can also make the process cleaner and more convenient.
How to Make Compost Faster
If your goal is to speed up decomposition, focus on the basics rather than buying unnecessary additives.
- Cut large scraps into smaller pieces.
- Maintain enough moisture.
- Provide oxygen by turning the pile.
- Keep a healthy mix of browns and greens.
- Don’t let the pile become extremely dry.
- Don’t overload it with wet kitchen scraps.
- Build a sufficiently large pile when possible.
A healthy compost system is more about creating the right conditions than adding a “magic” compost activator.
How to Fix a Smelly Compost Bin
A healthy compost pile should smell earthy. A strong rotten or unpleasant odor usually means something is out of balance.
Problem: The Compost Is Too Wet
Solution: Add dry leaves, shredded cardboard, or another brown material. Mix the pile to introduce air.
Problem: There Are Too Many Food Scraps
Solution: Stop adding wet greens temporarily and add plenty of dry browns.
Problem: The Pile Is Too Compact
Solution: Turn the pile with a fork or aerator and add coarse brown material to create air spaces.
Problem: Food Scraps Are Exposed
Solution: Bury or cover fresh scraps beneath several inches of brown material.
What If Your Compost Is Too Dry?
A dry compost pile can become extremely slow because decomposing organisms need moisture.
Add a small amount of water while turning the pile. Avoid flooding it. The finished mixture should feel similar to a wrung-out sponge.
If the pile repeatedly dries out, consider whether its location, container, or covering needs adjustment.
What If Your Compost Is Not Breaking Down?
If nothing seems to be happening, check the basic conditions first.
- Is the pile too dry?
- Is it too wet?
- Does it contain too many browns?
- Does it contain too many greens?
- Is the material too large?
- Does the pile have enough air?
- Is the pile too small to retain heat?
Try correcting one or two conditions at a time instead of changing everything at once.
How to Keep Flies and Rodents Away From Compost
Pests are one of the biggest concerns for beginners, but a properly managed compost system can greatly reduce the problem.
- Keep a lid on an enclosed compost bin.
- Cover food scraps with brown material.
- Don’t add meat, dairy, or greasy food to a typical backyard pile.
- Avoid leaving fresh food scraps exposed on the surface.
- Maintain a healthy brown-to-green balance.
- Turn the pile when necessary.
The EPA recommends keeping food scraps covered and maintaining approximately two to three parts browns to one part greens to help reduce pest problems.
Hot Composting vs. Cold Composting
There are two broad approaches beginners often hear about.
Hot Composting
Hot composting aims to create conditions where microorganisms rapidly break down a well-balanced, sufficiently large pile. Temperatures rise as microbial activity increases.
It can produce compost faster, but it usually requires more attention to ingredients, moisture, aeration, and pile size.
Cold Composting
Cold composting is more relaxed. You add suitable organic materials and allow them to decompose naturally with less active management.
The tradeoff is that it generally takes longer.
If you’re a complete beginner, starting with a simple cold or moderately managed system may be easier than trying to perfect hot composting immediately.
Can You Compost in Winter?
Yes. Composting doesn’t necessarily have to stop during cold weather.
Decomposition may slow when temperatures drop because microbial activity decreases. You can continue adding suitable materials and allow the pile to become more active again when conditions improve.
A larger, well-insulated pile generally retains heat better than a tiny pile.
Beginner Composting Mistakes to Avoid
1. Adding Too Many Kitchen Scraps
Food scraps are useful, but adding them without enough dry browns can make the pile wet and smelly.
2. Forgetting About Air
A compacted pile can become poorly aerated. Turn it occasionally and include coarse material that creates air spaces.
3. Keeping the Compost Soaking Wet
Compost needs moisture, but saturated material can create odor and poor airflow.
4. Adding Things That Don’t Belong
Meat, dairy, plastic, pet waste, treated wood, and other unsuitable materials can create problems in a basic home compost system.
5. Expecting Compost in a Few Days
Composting is biological decomposition, not an instant process. Give the microorganisms enough time to do their work.
6. Making the Process Too Complicated
You don’t need to measure every ingredient with laboratory precision. Learn the basic principles, observe the pile, and make small adjustments.
A Simple Home Composting Recipe for Beginners
If you want the simplest possible starting formula, use this:
- Choose a suitable compost bin or pile.
- Start with coarse brown material.
- Add fruit and vegetable scraps.
- Cover the scraps with dry leaves or shredded cardboard.
- Continue adding greens and browns.
- Keep the pile damp like a wrung-out sponge.
- Turn it occasionally to add oxygen.
- Watch for excessive moisture, dryness, or odor.
- Allow the finished compost to mature before using it.
That’s it. You don’t need an expensive setup to begin.
Final Thoughts: Start Composting Today
Learning how to compost at home doesn’t require a perfect garden, expensive equipment, or years of experience.
Start small. Keep a supply of brown material nearby, collect suitable kitchen scraps, maintain moisture, provide air, and pay attention to what your pile is telling you.
If the pile smells bad, add browns and air. If it is too dry, add moisture. If it isn’t breaking down, check the balance, moisture, oxygen, and particle size.
With a little practice, those everyday kitchen scraps and garden materials can become useful finished compost for your plants and soil.
FAQS
1. How do you compost at home for beginners?
Start with a suitable compost bin or pile. Add a mixture of green materials such as fruit and vegetable scraps and brown materials such as dry leaves and cardboard. Keep the pile moist but not soggy, provide air by turning it occasionally, and give it enough time to decompose.
2. What is the easiest way to compost at home?
For people with outdoor space, a basic enclosed compost bin is one of the simplest approaches. Add kitchen scraps and garden waste while maintaining a good supply of dry brown material.
3. What should I put in my compost bin?
Common suitable materials include fruit and vegetable scraps, coffee grounds, suitable tea leaves, crushed eggshells, dry leaves, untreated plant material, shredded cardboard, and plain uncoated paper.
4. What should I not put in my compost?
A typical backyard compost pile should generally avoid meat, fish, bones, dairy, oils and grease, pet waste, plastic, treated wood, diseased plants, glossy paper, and other contaminated or unsuitable materials.
5. What is the best ratio of brown to green compost?
A practical beginner starting point is approximately two to three parts brown material to one part green material by volume. Adjust the mixture according to moisture, smell, and decomposition activity.
6. How often should I turn my compost?
There is no single perfect schedule for every compost system. Turn it when the pile needs more air or when you want to encourage faster decomposition. Regular turning can help aerate and mix the materials.
7. Why does my compost smell bad?
A bad smell often means the pile is too wet, poorly aerated, or contains too many nitrogen-rich food scraps. Add dry brown material and turn the pile to improve airflow.
8. How long does compost take to be ready?
A well-maintained backyard compost pile can be ready in roughly three to five months, although conditions vary. An unmanaged pile can take much longer.
9. Can I compost without a garden?
Yes. People without yards can consider worm bins, compact composting systems, or other methods designed for apartments and small spaces.
10. Can I compost banana peels?
Yes. Banana peels are a common green compost material and can be chopped into smaller pieces to help them break down.
11. Can I compost coffee grounds?
Yes. Coffee grounds can be added to a home compost system. Mix them with plenty of brown materials rather than allowing a thick layer of grounds to form.
12. Can I compost eggshells?
Yes. Crushed eggshells can be added to compost. Crushing them into smaller pieces makes them easier to distribute through the pile.
13. Can I compost grass clippings?
Yes, untreated grass clippings can be composted. Because fresh grass is wet and nitrogen-rich, mix it with dry brown materials to prevent compacting and odors.
14. Can I compost in an apartment?
Yes. A traditional backyard pile may not be practical, but compact worm composting and other small-space systems can provide alternatives.
15. How do I know if my compost is ready?
Finished compost is typically dark, crumbly, relatively uniform, and earthy-smelling. It should no longer resemble a pile of fresh food scraps, and active heating should have stopped.
Read more: Domikyo.com: Complete Guide to the Blog, Topics, Guest Posts, and What You Will Find